Friday, July 31, 2009

Removing Windows, Prepping & Painting


Now it’s time for paint. I have read and reviewed a ton of arguments about letting professionals paint it versus do-it-yourself jobs and spraying versus the $50 roller method. I planned on doing this in the driveway one side at a time over a few weeks. I wanted something durable, that looked good to the average camper owner, and was easy to touch up if something scratched it. $1,000 to $2,000 on a pro job was out. Spraying in Oklahoma wasn’t a good idea either unless I wanted to spot spray the neighborhood while I was at it. You know,


“Where the wind comes sweepin’ down the plain”


After reading about the $50 dollar job on a few Shasta sites and a couple automotive sites, I decided it would be easy enough. Besides, even at $150, if I decided I wasn’t happy after a few years, I could strip it and spray it. Here are a couple good places to get started researching:

Paint Techniques and The $50 Paint Job


So I went to Lowe’s and got about $30 dollars worth of 6” foam rollers, small foam brushes, and some throw away paint trays. I also got a roll of Frog Tape for $10. I picked up a spray can of self-etching primer for the bare aluminum spots for about $5 and a can of Goo Gone for $3. I got my paint from Sherwin Williams. It is their Industrial Alkyd Enamel; they keep it in the back room, far away from California, and they can tint it to any color. I went with SW paint because I always buy my paint there, I like the guys that run the store, and I get a good deal. I got 3 gallons for $98. We went back with colors close to original, bright white replacing the slight off white on the upper half and a sky blue that Cheryl picked out called Cloudless for the bottom half.


As I began prepping the trailer, I decided that Cheryl was right. That’s right folks, I am saying right here that she was right. It just made more sense to do what she suggested and move this project indoors. I figured that as soon as I pulled windows out on one side, a monsoon would arrive and I would be trying to cover wet paint with a tarp. So we packed up, went to the in-laws for the weekend and put the camper in the shop. Now there was still dust and dirt (it’s a farm shop) and there was no practical way to set up proper ventilation for spraying, so I stuck with the roller method.


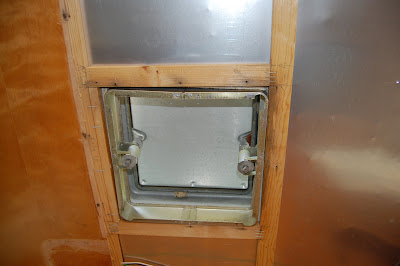
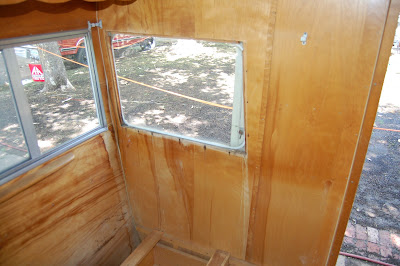
I spent most of the day Saturday pulling windows, rusty screws, vent covers and door hardware. On the Hehr windows, the Jalousie windows are pretty straight forward, basically you remove the screws, and peel the window off the trailer. On the other Hehr windows, the ones with the hinge along the top, there are hidden screws under the old crusty rubber moulding.


Even the long front window across the front that is part of the panoramic set had hidden screws. Don’t let the fact that there are visible screws along the bottom of the window frame fool you; there are also screws just above these under the moulding.


Once ALL of the screws were removed, the window popped right out.


Some screws had to be persuaded. Once again, some were so rusted that they had to be backed out with vice grips.


Some of the more difficult ones I tried to drill out, but they were harder than hell.


This made me very unhappy.


So I resorted to grinding grooves in them with a cut off wheel and backing them out with a big flat blade screwdriver.


The old putty tape was dried out and just fell off onto the ground. I had a few places where it still hung on for dear life and I had to persuade it with a plastic putty knife. Once I had the windows out, I just stacked them in an out of the way corner for polishing later. I labeled the back windows, drip edges and access doors with a sharpie in case they were not interchangeable.


I removed the lights taking pictures as I went so I would have a reference for wiring. I will address this more when I talk about reinstallation in a later blog. I will talk about the removal and rotted condition of the wings at a later time as well.


With the windows out, I was ready for paint prep. I had to wire brush the remains of the old putty, silicone, and other various other kinds of caulking from various periods of its life.


After most of the gunk was ground off, I went back with Goo Gone to clean off the last of the goo.


I used the Frog Tape on the stripe to get the cleanest line possible.


I then went over the entire camper one last time with a mild solution of TSP substitute and water.


I then used the etching primer on the bare aluminum areas around the stripe and other bare spots on the trailer.


After letting it dry overnight, I was ready to start rolling. I started on the upper half with the white, working quickly from the upper corner, keeping the edge wet and watching for drips. I had a small foam roller and brush that I used along the edges as I went. I worked all the way around the trailer, rolling on a light coat, and then letting it cure for eight hours. I ended up using four coats to get the coverage I wanted. Three would have been okay, but I wanted another coat to help with scratch resistance.


First Coat:


Second Coat:


Third Coat:


Fourth Coat:


I then used some less expensive blue tape along the upper edge to protect myself from the occasional wild roller with blue paint.


The blue paint covered much better than the white and I ended up only using three coats.


First Coat:


Second Coat:


After the last coat of blue had cured for eight hours, I removed the tape one side at a time, pulling sharply at an angle away from the painted edge. The Frog Tape made beautiful edges.


I only had a couple spots that bled through and this was due to user error. All in all, I am completely satisfied with the results. It took me two weekends to finish, but I was polishing windows and goofing off while I watched the paint dry. I have a few touch-up areas, a couple drips to sand, and two spots where I still got too crazy with the roller, but I will do those after the paint has cured for a couple weeks.


So, if you are following along, so far we have:


Trailer $900

Bearing Repack $100

Steel $10

Sealant $10

Fan-Tastic Fan $140

Three Sheets 1/8 Birch $50

3M Polish $18

Buffer Pad $12

Mothers Aluminum Polish $8

TSP Cleaner/Paint Prep $8

Rollers, brushes and trays $30

Frog Tape $10

Etching Primer $5

Goo Gone $3

Paint 3 Gallons $98


Bringing our tally to: $1,422


Until next time dear readers, shasta la vista...

Wednesday, July 29, 2009

Polishing the Z Stripe

So moving to the outside for a while, I decided to tackle the stripe first. I had seen some pics of others polishing the stripe and the grime it produced, so I decided that it would be best to do this before painting. I had emailed Jeannie & Jerry from Questa, NM about polishing after I read their post on the Vintage Shasta Group where they discussed polishing their stripe, and they gave me the skinny:


Round One-----3M Super Duty Rubbing Compound #05954

Round Two----Aluminum Rouge

Round Three--Coat of Mothers Wax to keep the shine


I found the 3M compound at my local automotive paint store, The Paint Place, for about $18/quart.


I also picked up a new wool pad for my old beat up buffer for about $12. I might have found it cheaper if I had looked around more, but I was also paying for advice on polishing aluminum, rule numero uno, don’t run the buffer above 12-1500. Any faster and it heats up the metal too much, burning the compound and making more work. Now on to the rouge…here in town I had no luck finding the rouge at the box stores, auto shops or hobby shops. I found it online, but I refused to pay $9 shipping for a $4 bar, so I decided to try Mothers Aluminum Polish first for $8 at AutoZone,


I picked up a bottle of TSP substitute at Lowe’s for about $8 for an initial cleaning. Don’t use regular TSP, it reacts with the aluminum, turning it darker. I didn’t know that either; I read it on the box.


Here is what the aluminum looked like after a quick wash to get off any residue, dirt, bugs, etc.


Then I got to work. It is a messy process; I mean black grime coats your body from head to toe. Wear clothes that you don’t mind ruining. I polished about two feet at a time, smearing polish on with one rag, polishing until black residue appeared and then until it started to disappear, then wiping clean with a second cloth to check shine. I repeated this process two or three times per section until I was satisfied.


I worked my way around the camper, washing each side after I was done to keep the residue from drying to concrete on the paint. At this point I was already amazed; the oxidation was gone and I could see my reflection, although hazy, in the stripe.


It was a couple of hours stooping and lugging my 500 pound buffer and extension cord around. When I finished round one, I went in and had a shower and half a bottle of ibuprofen.


The next evening I started my version of round two. I applied the Mothers Aluminum Polish in the same fashion as the 3M and polished it off with a new wool pad. Never use different compounds on the same pad. Even after washing, grit from a coarser polish can remain and cause scratches and swirls when you are trying to achieve a final polish. As I worked my way around, I was happy with the results. I attained a mirror finish.


I washed the stripe down again once I finished, removing excess polishing residue. Then I repeated the shower and ibuprofen regimen from the previous night. To keep the shine I will give it a coat of Mothers Wax once a year or so.


So, if you are following along, so far we have:


Trailer $900

Bearing Repack $100

Steel $10

Sealant $10

Fan-Tastic Fan $140

Three Sheets 1/8 Birch $50

3M Polish $18

Buffer Pad $12

Mothers Aluminum Polish $8

TSP Cleaner/Paint Prep $8


Bringing our tally to: $1,256.


Until next time dear readers, shasta la vista...

Thursday, July 23, 2009

Repairing Water Damage, Installing Roof Vent, Adding Support to Ceiling, Sealing Exterior Seams

Okay, so let’s begin. I backed it into the driveway, leveled it and put the jacks down to keep everything stable while I work. I pulled out the dinette cushions and the rear gaucho cushion to make room for tools and supplies. I also ran power and brought in a fan, because this is Oklahoma, folks. It’s 100 degrees and humid. First things first, I tackled the water damage. I removed the cabinet which was mostly screwed in, but also had some sneaky nails from the top side of the frame that ran along the front edge; these had to be cut.


Once the cabinet was out of the way, I could remove the ceiling panel. I pulled the 1” strips and all the nails in the full ceiling panel around the vent. The damage wasn’t very extensive, but I wanted to reinforce the weak/sagging ceiling “beams” while I was at it. I put beams in quotes because they used 1”x2” pine for the supports and after 50 years they have started to bow. I am not removing the walls so I just scored and cut the panel flush with the walls and yanked it out. I was surprised that there was very little sign of water damage other than the veneer; the frame around the vent was still intact. I picked up some ¾” square tubing at the Railroad Yard, our local steel yard, for about $10 to reinforce the ceiling. I just predrilled holes for screws and wiring and used 1 ¼” screws to fasten three pieces of steel to the existing wood. I am willing to sacrifice a little increase in weight for the additional 2” of head room and lack of water pooling overhead along a roof seam and vent.


I then installed the Fan-Tastic fan and routed the wiring to be connected later. The fan was a great fit, and easy to do following their step-by-step instructions. I got it from Vintage Trailer Supply for about $140. It has a three-speed fan and is gray in color with a flat, not domed, lid that makes it look similar to the original Hehr roof vent, which now resides in my spare parts pile. While I was sealing up the new vent, I took the time to scrape off old roof cement around the seams to reseal them, as well as a small pin hole near the vent. I used Dicor self leveling seam sealant I picked up from our local RV dealer, Mason’s RV for about $10.

Now that the roof wouldn’t leak, I moved back inside. I removed two pieces of birch from under both windows. Here, there was some water damage to the framing so I removed the ~3,000 50-year-old rusted screws from the bottom of each window, and the glass which was held in with approximately 30 pounds of caulking. I managed to get most of the screws carefully with my cordless driver. Others had to be coaxed with a small set of vice grips. The last couple had to have slots installed with my grinder and were removed with a large screwdriver.Once the glass was out of the way and the screws had been removed, I could pull the old frame and install new wood. Luckily, months earlier, being the pack rat that I am, I had picked up about 50 linear feet of oak flooring for free on Freecycle. I used this as my new framing, which substantially improved the rigidness of the front end. I then cut new birch panels that I picked up for $17 each at Stillwater's Douglas Building Supply to fit in the ceiling and sides, to be trimmed out later. It took a couple weeks to get the 4x8 sheets but the price was right, and I was still working on the tear out anyway. I then reinstalled the glass to keep the weather out until I paint. I want to replace two small areas on either side of the front window, but these will have to wait until I remove the frame for painting. I used more oak to beef up both sides of the dinette and the rear gaucho since all creaked a bit when I settled my delicate frame upon them (HA HA).


After this I will move outside for a while to work on a few exterior projects. So, if you are following along, so far we have:


Trailer $900

Bearing Repack $100

Steel $10

Sealant $10

Fan-Tastic Fan $140

Three Sheets 1/8 Birch $50


Bringing our tally to: $1,210.


Until next time dear readers, shasta la vista...